
It is imporant to keep hydrated while out on a long paddle, especially during hot days. To accomplish this, we started out by buying rubber rings attached to a clip. We would buy bottled water and slip the ring over the neck of the bottled waters and clip them to the deck lines on the front deck of our kayaks. We soon found a couple of problems with this solution. One being that it cluttered our front deck. The second problem was that in order to drink, we had to stop paddling. It was very difficult to unclip the bottle from the deck line, unscrew the cap, drink, screw the cap back on, and re-clip the bottle to the deck while trying to keep up with a group or in rough waters. The third problem was that on hot days, even if we froze the bottled waters the night before, the ice soon melted and the water heated very quickly. The result... we weren't drinking nearly enough water and we needed a better solution.
Recently we customized our kayaks with hydration packs. We can't take the credit for this idea, but when you see a good idea and it works, why not copy it? We went out and bought ourselves a couple of Camelbak hydration packs. The long drinking hose let us be able to drink leaving our hands free for more important stuff, like paddling. However, attaching the pack to our decks still left us with two problems, a cluttered deck and warm water, but we weren't finished.
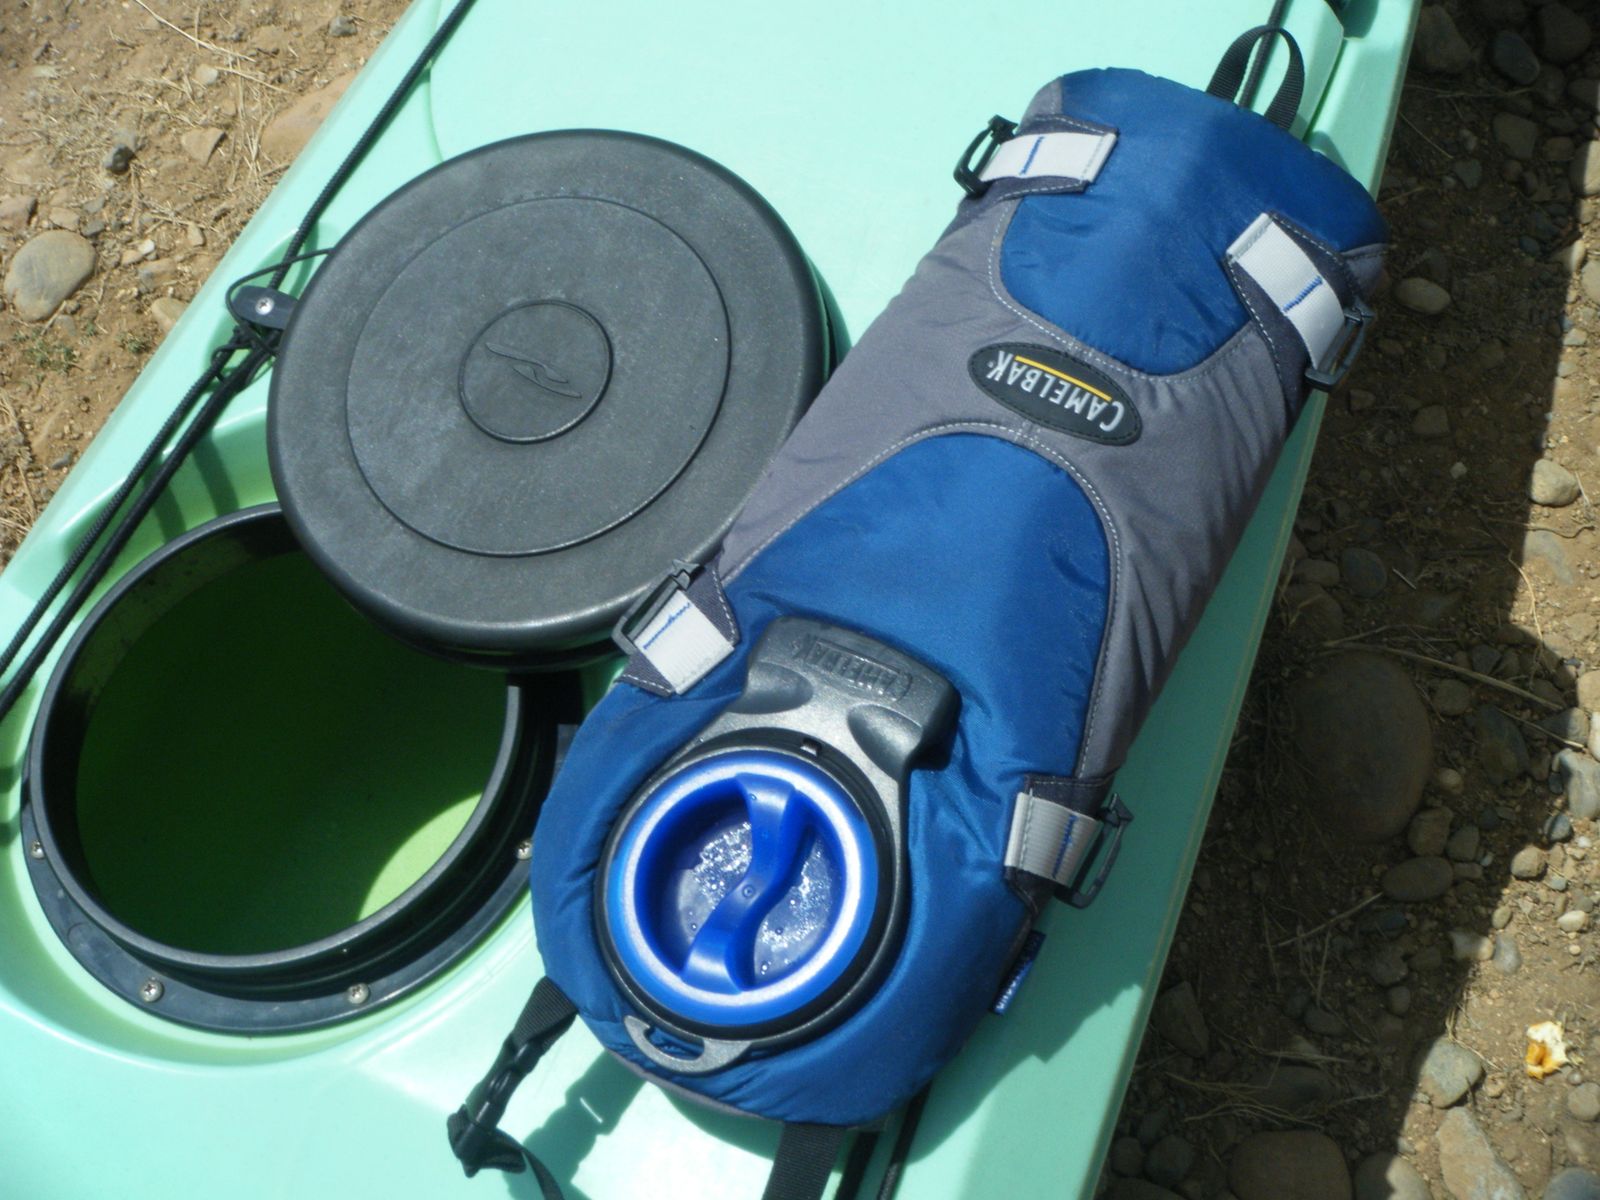
Now, I know this solution isn't for everyone, especially when it comes to step number one... drilling a hole in your kayak. Since this idea was originally my dad's and both of our kayaks were originally his until they were appropriated by us and because we were afraid we might screw something up, we let dad drill the hole. I decided I wanted my pack to be kept in my day hatch, so I chose a spot directly behind my cockpit that was within easy reach. Once the hole was drilled we inserted a Ferrule, 5/16", Screw Down Deck Bushing that we purchased at West Marine. We used silicone sealant to seal around the bushing and the screws.
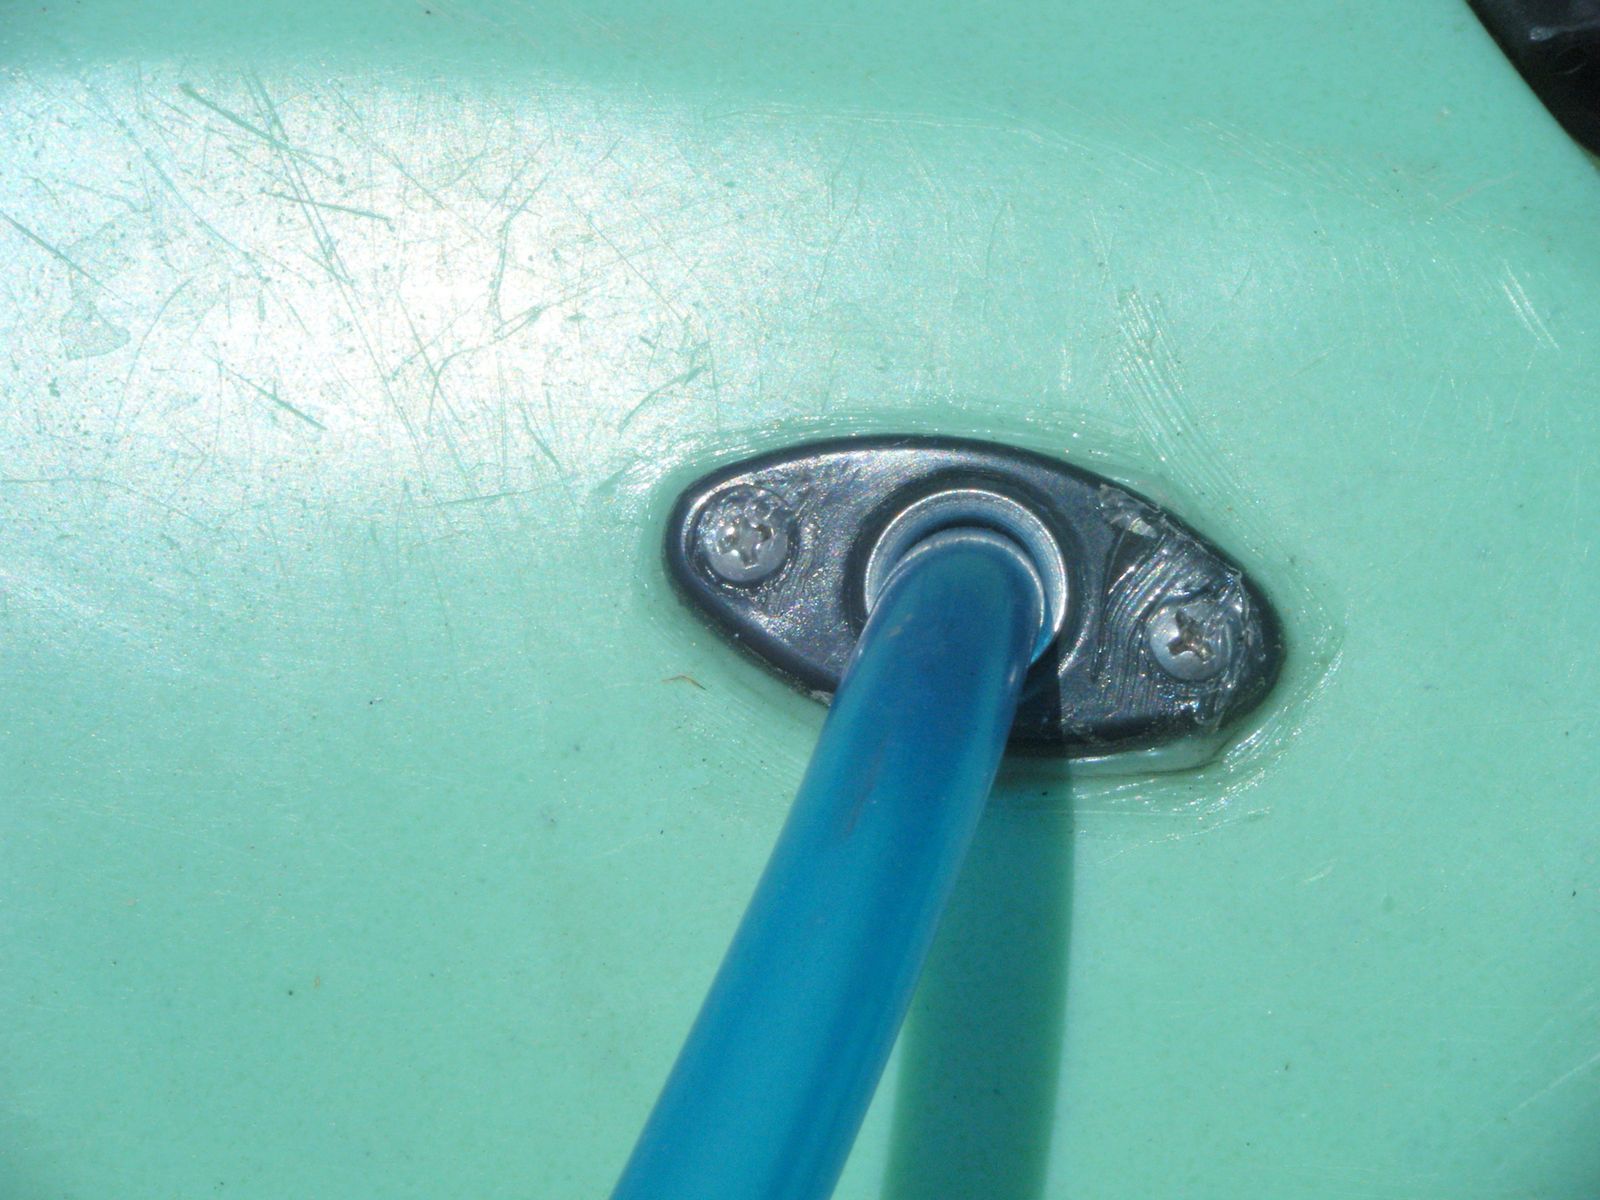
We had also purchased extension hoses for our Camelbaks. We inserted the extension hose into the bushing, making sure the adapter was inside the hatch. The hose fits very tightly making the hole waterproof. In fact, we needed to spray 303 on the hose and work it in. It took quite a bit of effort.
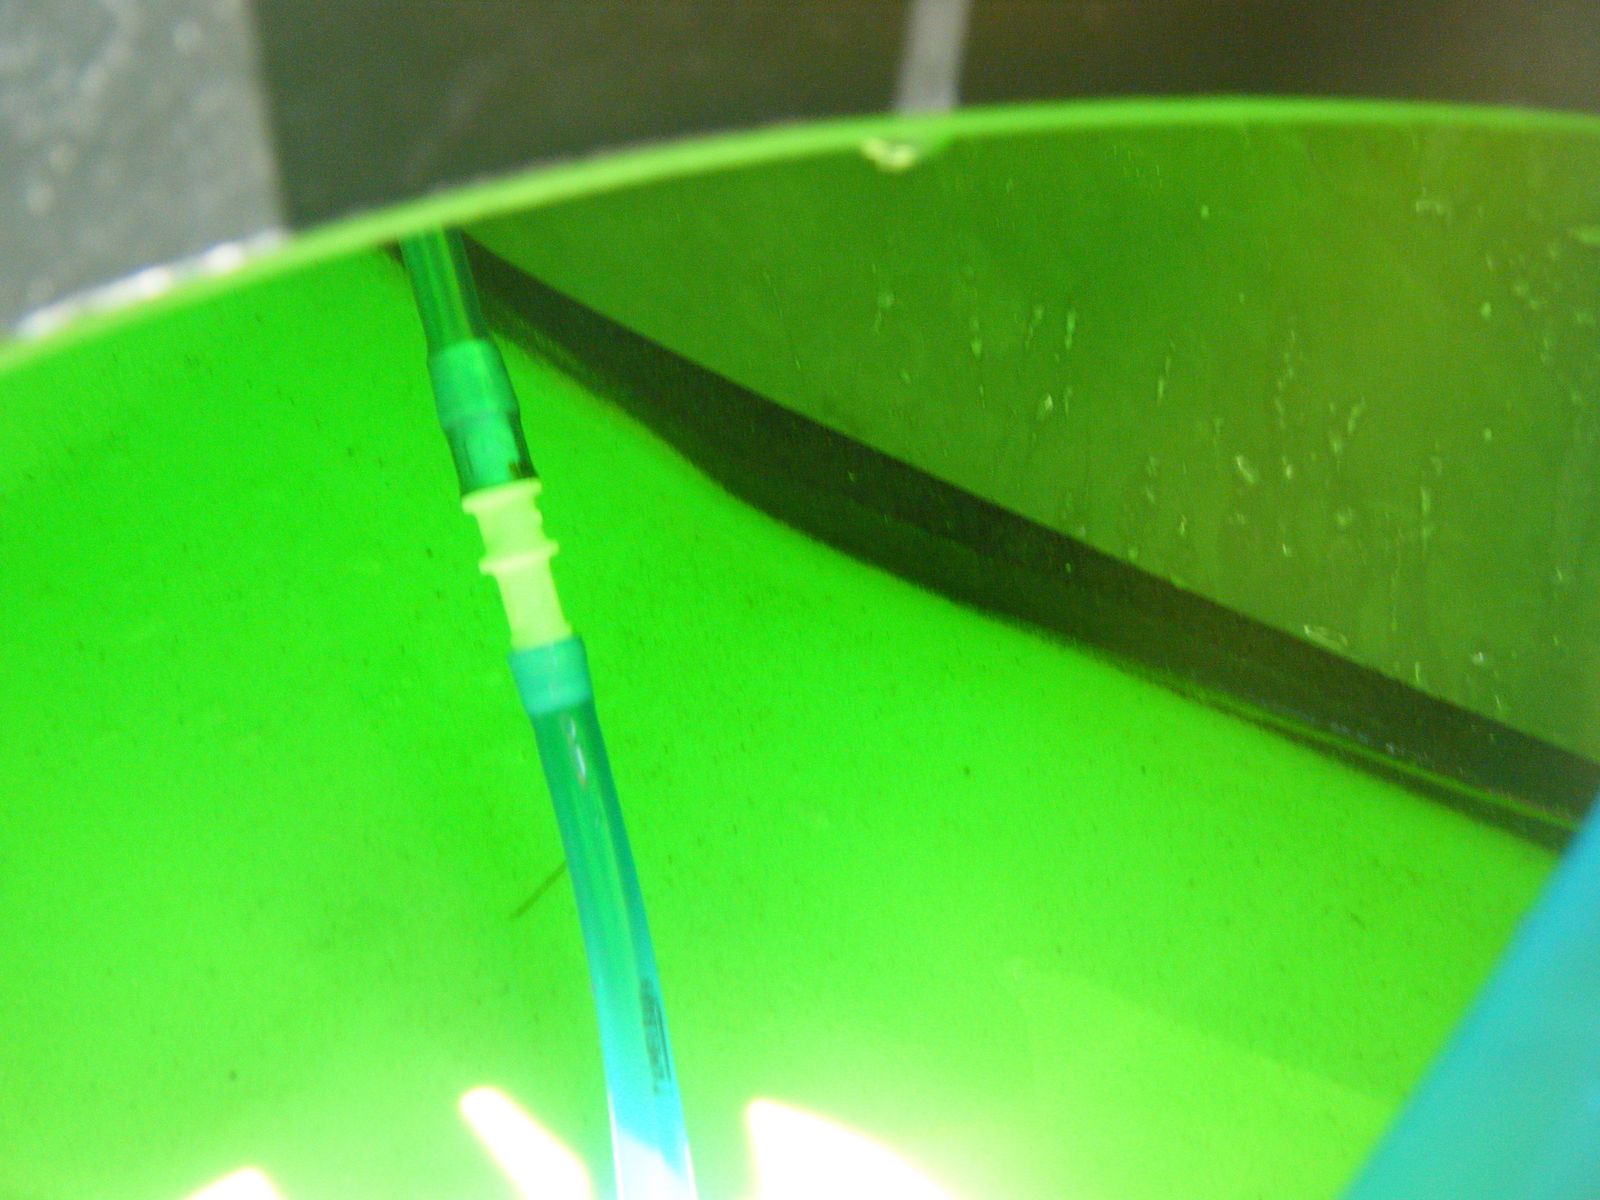
We attach the hose from the Camelbak to the adapter inside the hatch.
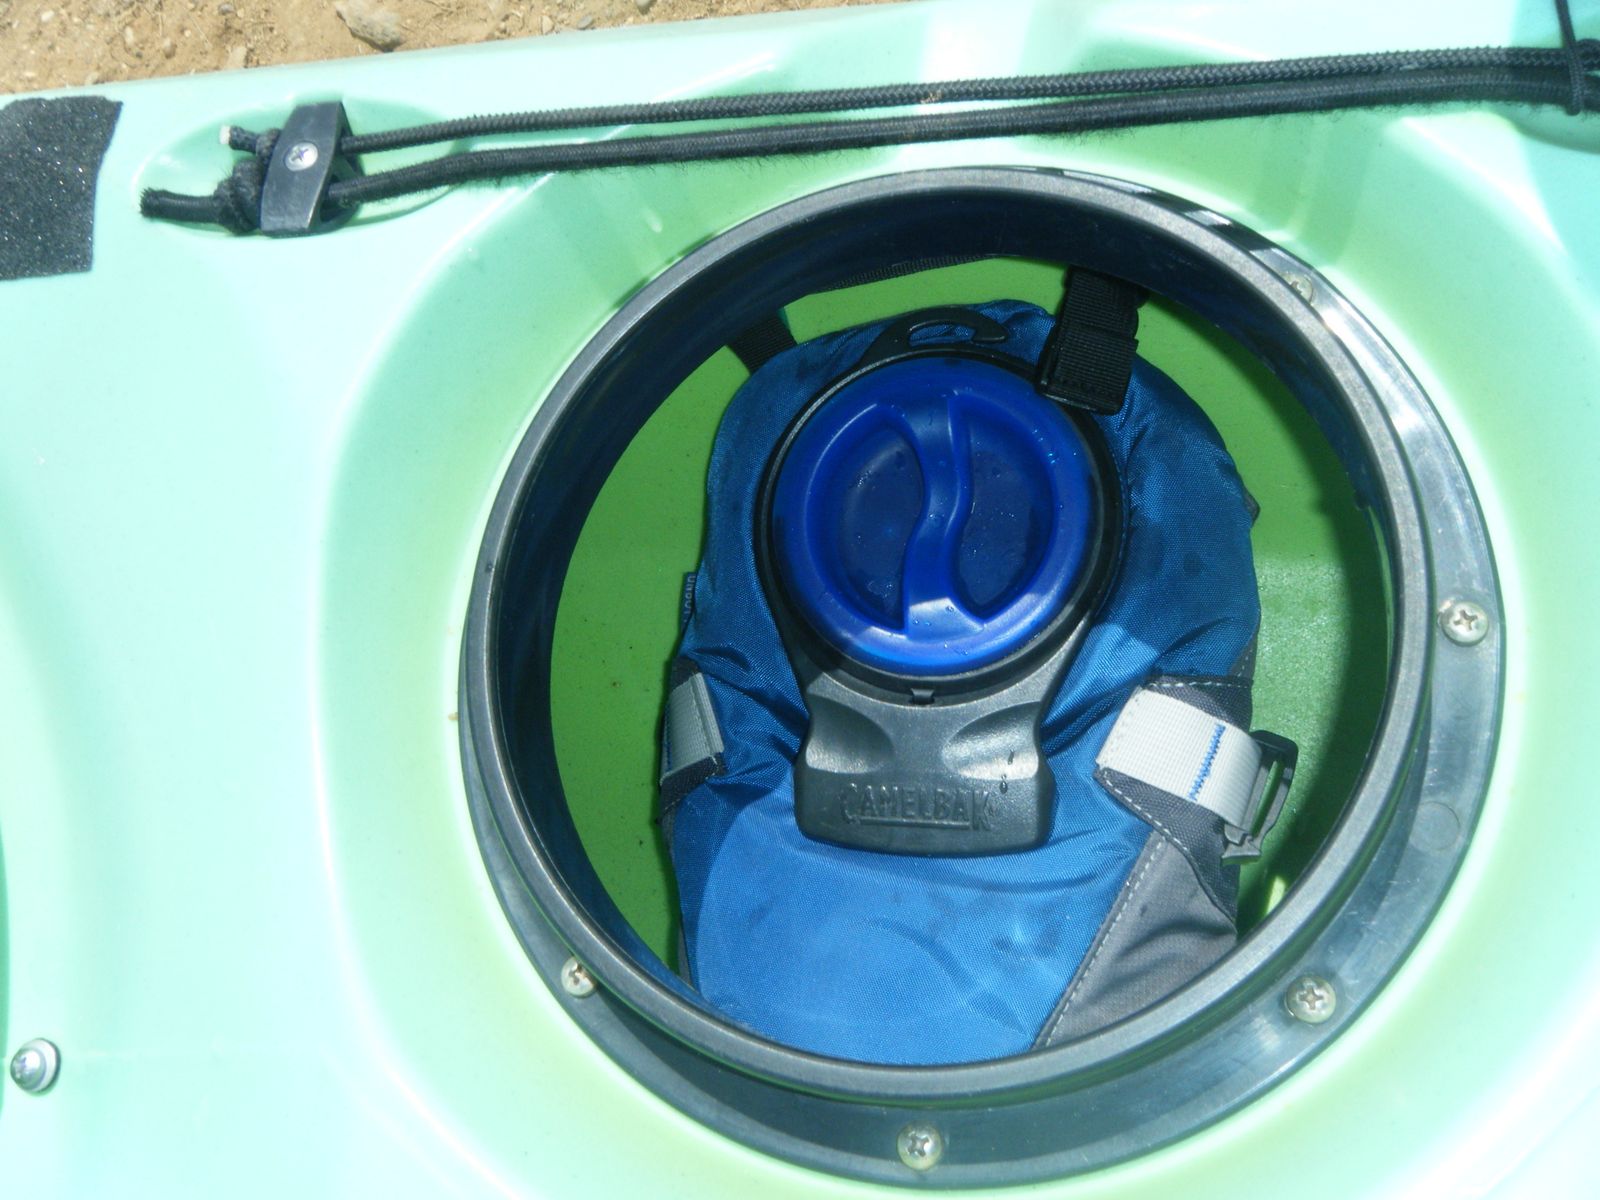
We place the Camelbak inside the hatch and cover.
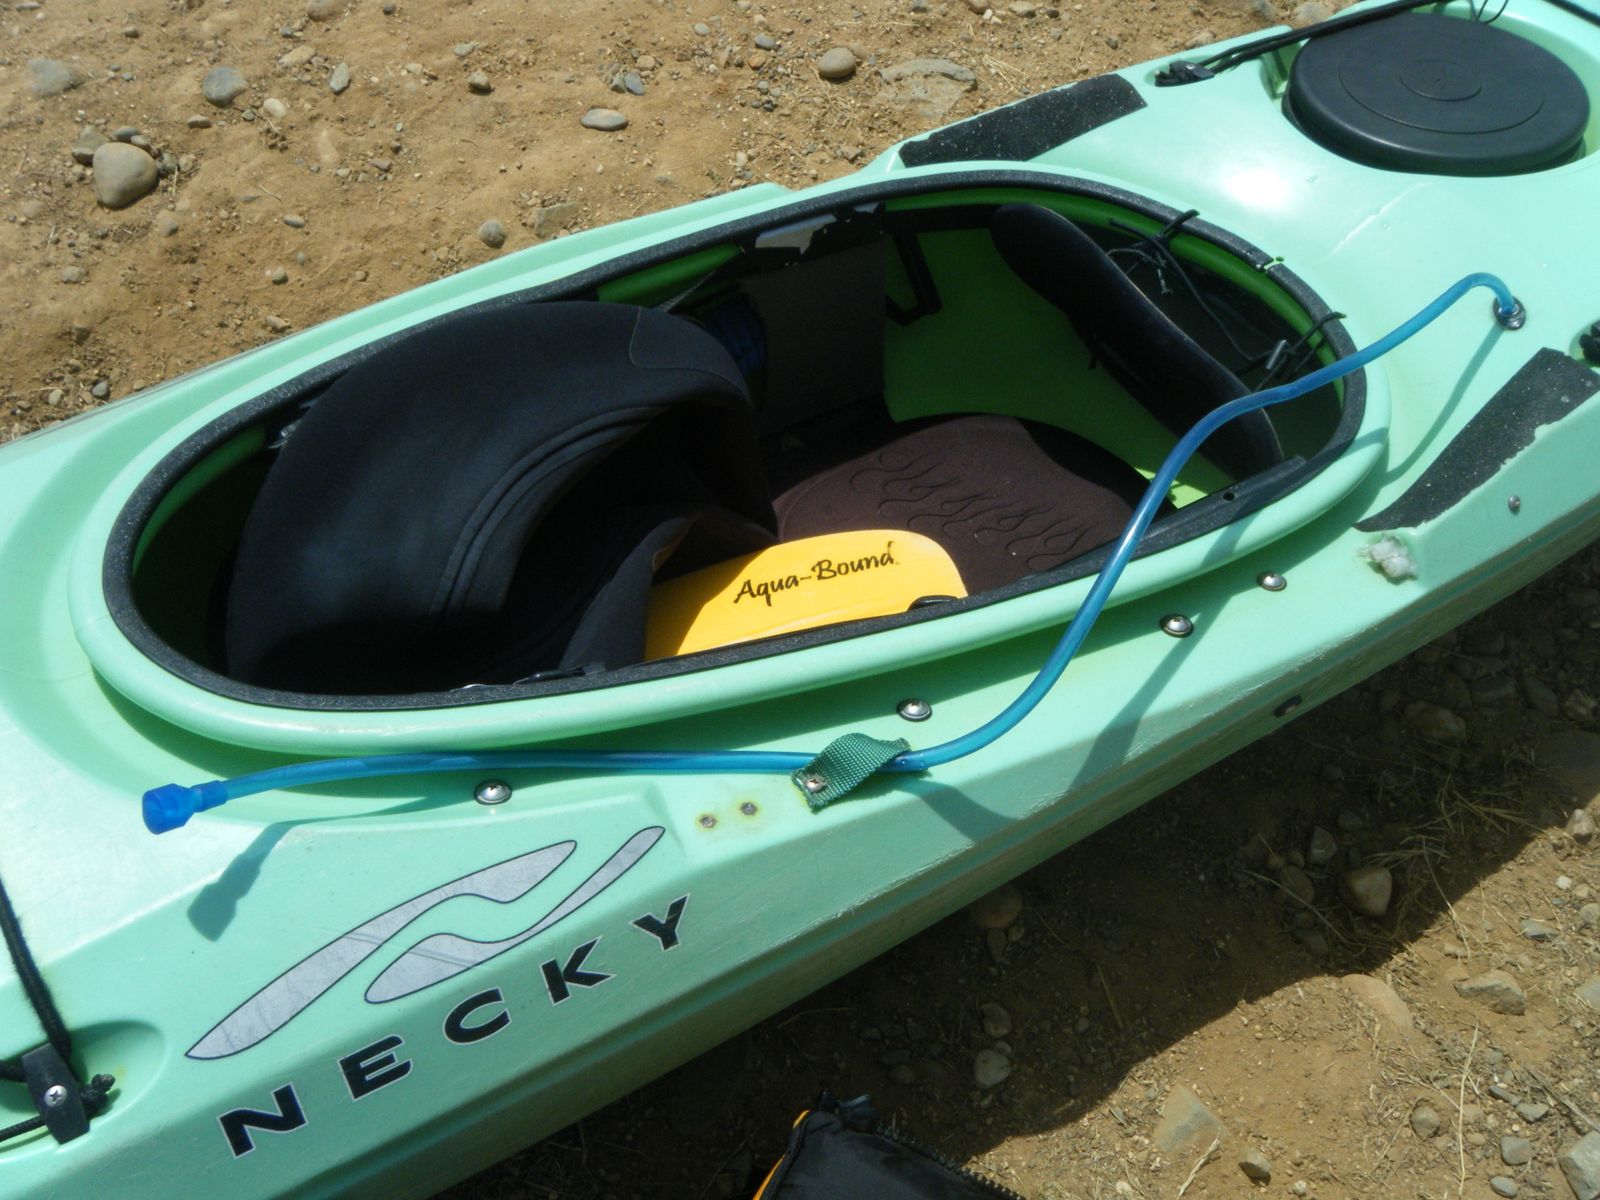
Walla! We now have a hands free hydration pack, an uncluttered deck, and best of all, because the water sits on the bottom of our kayak which is usually (for us) sitting on cool or cold water, we have cold water to drink all day long!
I created a little loop to stick the end of the hose through from left over hatch straps and the screws from old rudder hardware that I removed since I have never had a rudder on my kayak. My boyfriend was able to wrap a strip of velcro around his hose near the end which sticks nicely to his spray skirt. These finishing touches are helpful in keeping the hose from falling into less desirable waters.
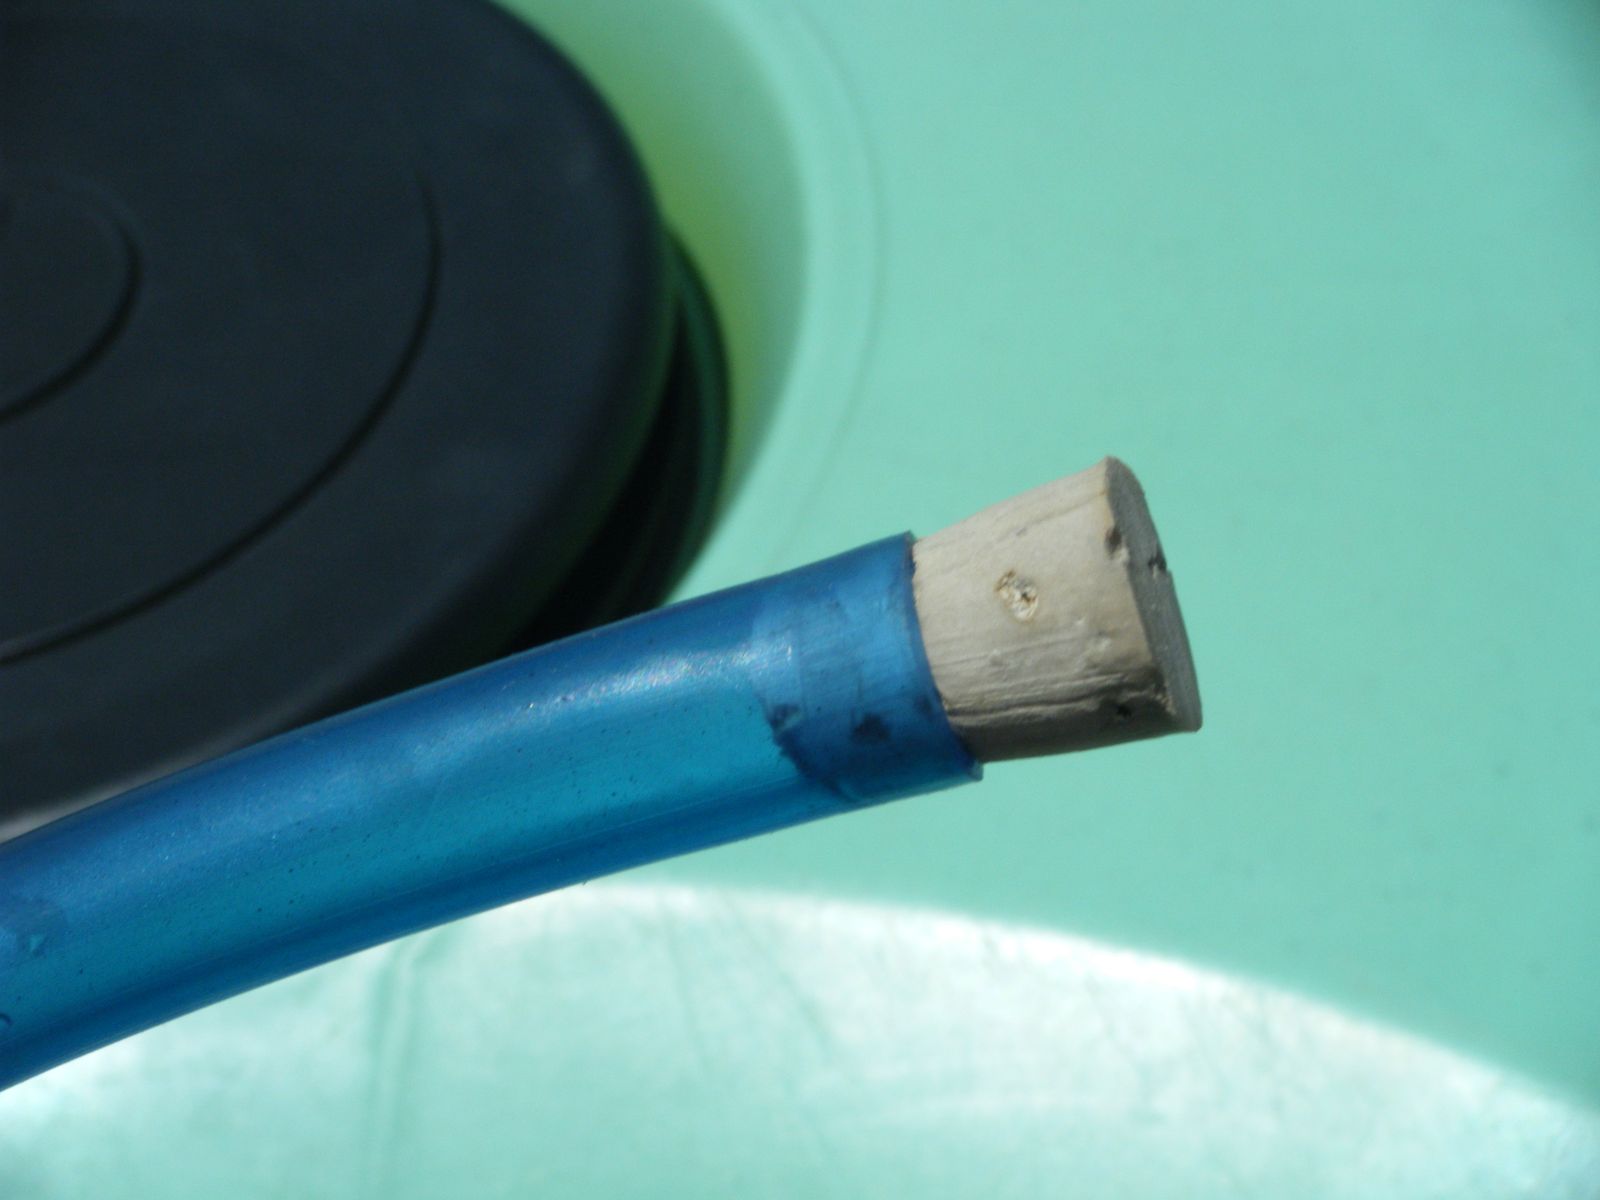
So, what if we are going rolling in the pool and don't want to bring along our hydration pack? We found 5/16" cork that can either be placed into the hole in the bushing if the hose is pulled out or into the hose itself to keep the water out and our hatch dry... or as dry as it can be with repeated rolling.
No comments:
Post a Comment